Key Takeaways
A roof is more than its visible shingles. Its structure, layers, drainage details, and ventilation features form one connected roofing system.
- A roofing system includes structural, waterproofing, covering, drainage, and ventilation components.
- The roof deck, underlayment, and flashing work together to manage water.
- Ventilation and insulation help control attic temperature and moisture.
- A roof replacement should address hidden components, not just worn shingles.
- Leaks, missing shingles, damaged flashing, and attic moisture deserve prompt attention.
What Is a Roofing System?
A roofing system is the complete assembly that covers and protects a home. It includes the roof structure beneath the surface, the deck, waterproofing layers, roof covering, flashing, drainage features, insulation, and ventilation. Each part has a separate job, but the parts of a roof are designed to work as a connected whole.
At Above It All Roofing, we’ve spent over 25 years inspecting and replacing roofs across Halton Hills, Georgetown, Milton, Oakville, Burlington, Mississauga, Caledon, and Etobicoke. The roofs that fail early almost never fail because of one bad component. They fail because one weak link, usually ventilation or flashing, quietly overloads everything downstream of it. A roof that looks fine from the curb can still be losing the fight underneath.
How the Different Parts of a Roof Work Together
The roof structure creates the shape and slope of the roof, while the deck provides a firm base for the layers above it. Underlayment and flashing help direct water away from vulnerable areas, and shingles or another roof covering shield the assembly from sun, rain, wind, and snow. The roof anatomy guide offers another useful way to visualize these roof layers and their relationship.
A roof can still look acceptable from the ground while a hidden layer has begun to fail. Water may enter around a chimney, collect in a valley, or move through a damaged deck before it becomes visible indoors. That is why the complete assembly matters more than any one roof component.
We’ve been called out to homes where a homeowner noticed a small ceiling stain nowhere near an obvious leak point, only to trace it several feet up slope to a valley where ice had backed up under a gap in the underlayment. By the time the stain appears, the decking underneath has often already started to soften. The shingles above it can still look completely normal.
15 Essential Components of a Roofing System
The following roofing components are common on residential sloped roofs, although exact materials and details vary with the home’s design, climate, and local requirements. Some are visible, while others sit beneath the covering or inside the attic. Together, they form the main parts of a roofing system.
Layered residential roof showing key components
A roof is best understood as an assembly of connected parts rather than a single product. The roof structure carries the load, while roof layers shed water and protect the home from wind, snow, and sun. The following roofing system components are arranged from the supporting framework to the finishing and drainage details.
1. Roof Trusses and Rafters
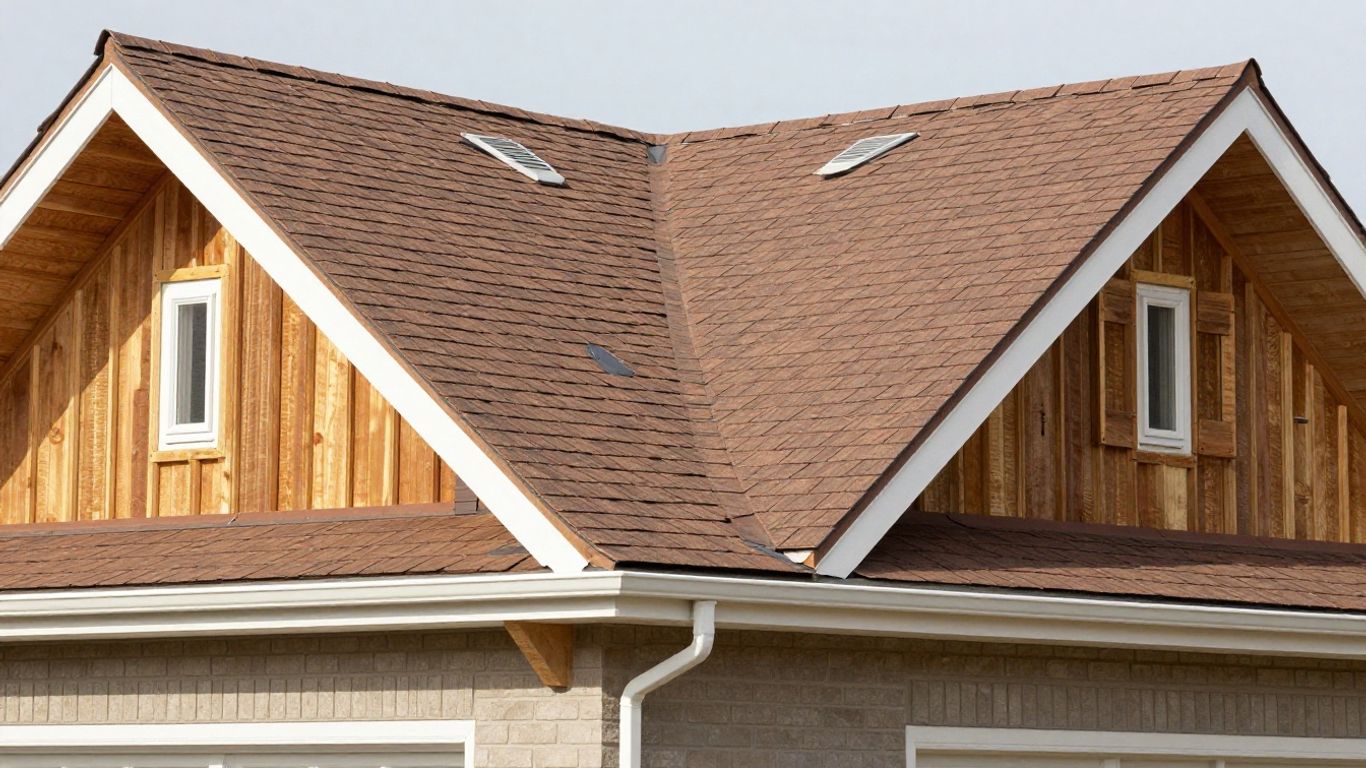
Trusses and rafters form the roof structure. Rafters are individual sloped members, while trusses are prefabricated frames made from several connected members. Both support the roof decking and transfer loads toward the walls, so damage, sagging, or unauthorized alterations in this area deserve prompt professional attention.
The shape of the roof also begins here. Rafter and truss layout influences the roof pitch, attic space, ridge line, and the way snow and rain move across the surface. Ground snow loads matter for roof framing across the GTA, and the National Building Code of Canada sets the design values municipalities use. This is worth discussing with your contractor whenever a homeowner considers adding rooftop solar or switching to a heavier covering like slate. A guide to pitched roof structure offers useful background on how slope, span, ridge, and eaves relate to the overall frame.
2. Roof Decking
Roof decking, also called sheathing, is the solid surface fastened over the rafters or trusses. It gives shingles and other roof coverings a continuous base while helping distribute loads across the structure. Common decking materials include OSB and plywood, with plywood generally holding up better under repeated moisture exposure over the life of the roof.
During a reroofing project, the decking should be checked for softness, staining, delamination, or broken fasteners. New shingles cannot compensate for a weakened base. On a typical Ontario home, we often find a handful of decking sheets need replacement once the old roof comes off, especially where ice damming has been a recurring issue. Replacing damaged sections before the protective layers are installed helps prevent future movement and uneven wear.
3. Ice and Water Shield
Ice and water shield is a self adhering membrane installed in areas especially vulnerable to backed up water. Ontario Building Code requires it to extend a minimum distance inward from the exterior wall line, which on a typical eave overhang usually works out to several feet of coverage from the roof edge. It’s also standard practice in valleys and around penetrations.
This layer matters most during a GTA winter, when a warm attic melts snow on the upper roof and the runoff refreezes at the cold eave, forming an ice dam that pushes water backward under the shingles. We’ve replaced sections of decking on homes where the ice and water shield stopped just short of code minimum, and that missing stretch was exactly where the leak happened. Wrinkles, gaps, and poorly sealed transitions during installation reduce its usefulness just as much as skipping it entirely.
4. Roof Underlayment
Roof underlayment lies between the decking and the roof covering. It acts as a secondary weather resisting layer, helping shed water if rain reaches beneath a shingle course. We install synthetic underlayment on nearly every job now rather than older asphalt saturated felt. It resists tearing in wind gusts before the shingles go down, which matters on multi day installs when a storm can roll through overnight.
Underlayment also protects the deck while the roof is being installed. It should be lapped and fastened according to the product instructions and roof conditions. It is not a substitute for shingles, but it is one of the roof layers that gives the assembly added depth and protection.
5. Roof Shingles
Roof shingles are the most visible part of many residential roofs and the primary roof covering in those systems. Asphalt shingles remain the most common choice in our market, with architectural (dimensional) shingles typically rated for 25 to 30 years and 3 tab shingles typically rated for 15 to 20 years. Metal panel roofing, by comparison, commonly carries a 40 to 75 year service life, though it costs meaningfully more per square installed. Homeowners may also encounter tile, slate, wood, or synthetic materials.
We work with CertainTeed products as certified installers, along with metal and standing seam systems. Material selection affects appearance, maintenance, service life, and cost. Homeowners comparing options can review roofing material choices before asking for estimates. Regardless of the material, installation details such as alignment, fastening, overlaps, and edge treatment determine how well the covering performs. We’ve seen premium architectural shingles fail well before their rated lifespan because of a poor nailing pattern, not a product defect.
6. Roof Flashing
Flashing is a water resistant material placed where the roof meets a wall, chimney, skylight, valley, or other interruption. It directs water away from vulnerable joints instead of allowing it to work into the roof assembly. We use step flashing (individual L shaped pieces woven into each shingle course) at wall intersections and counterflashing at masonry chimneys. Using continuous flashing instead of step flashing at a wall is one of the most common shortcuts we find during inspections of other contractors’ work.
Because flashing is concentrated at transitions, it often reveals installation problems before the broad roof field does. A contractor should inspect laps, sealant, fasteners, and signs of corrosion or displacement. These are among the areas discussed in a practical roofing mistakes guide, particularly when poor flashing can contribute to leaks and structural damage.
The following table shows why different flashing locations need different attention rather than one generic repair approach.
| Flashing location | Main purpose | Common concern |
|---|---|---|
| Wall intersections | Move runoff away from the wall joint | Lifted or poorly integrated pieces |
| Chimneys and skylights | Seal an opening through the roof | Cracked seals or exposed edges |
| Valleys | Guide concentrated water downhill | Debris, gaps, or incorrect overlap |
| Roof-to-wall transitions | Protect a change in plane | Missing step flashing or counterflashing |
A flashing issue may be localized, but water can travel beneath the surface before appearing indoors. That is why the visible stain is not always directly below the entry point.
7. Roof Valleys
A roof valley is the internal angle where two sloping roof planes meet. It collects runoff from both planes and channels that water toward the eaves. We generally recommend an open valley with exposed metal flashing on homes with steeper pitches or heavy tree cover, since it’s easier to keep clear of debris than a closed valley where shingles run across the junction.
Their design and installation deserve close attention because valleys handle a large volume of water during spring melt and heavy rain. Leaves, pine needles, and ice can obstruct the channel, while misplaced fasteners or inadequate underlayment can create leak paths. Keeping valleys clear is a simple maintenance step with practical value.
8. Drip Edge
Drip edge is a metal edging installed along roof perimeters, especially at the eaves and often along the rakes. It helps direct water away from the fascia and into the drainage path while protecting the edge of the decking. It also creates a neat boundary beneath the roof covering, and it’s required as a matter of course on every job we do, not an optional add on.
The order and overlap of drip edge pieces matter. Underlayment laps over drip edge at the eaves but under it at the rakes, a sequencing detail that’s easy for an inexperienced crew to get backward. When reviewing an estimate, homeowners can ask whether drip edge is included and how it will be integrated with the rest of the roof.
9. Ridge Cap Shingles
Ridge cap shingles cover the peak where two roof slopes meet. They are shaped and installed to follow the ridge, conceal the upper edges of field shingles, and help protect the roof’s highest seam, which is also the highest wind exposure point on the entire roof. Hip shingles perform a similar finishing role along sloping outside corners.
Ridge caps must be secured against wind while maintaining a consistent overlap. Ridge caps are often the first shingles to lift in a straight line wind event, which is why fastening pattern matters as much as material choice. If a ridge vent is present, the cap shingles must be compatible with that ventilation detail.
10. Roof Ventilation
Roof ventilation allows air to move through the attic or roof assembly when the design calls for a vented system. Intake vents are commonly located near the soffits, while exhaust may occur at the ridge, gable, or through other approved vent types. Balanced airflow helps manage attic heat and moisture, and building code sets minimum net free ventilation area based on attic floor space, split roughly evenly between intake and exhaust.
A ventilation plan should consider the attic’s size, insulation, air sealing, roof geometry, and local requirements. The goal is not simply to add as many vents as possible. Homeowners can use this roof ventilation guide to understand why intake and exhaust need to work as a system; Above It All Roofing also discusses calculating vent needs for homes and commercial properties.
For a quick inspection conversation, these signs can suggest that ventilation deserves closer attention:
- Excessive attic heat during warm weather.
- Condensation or damp insulation in the attic.
- Frost or moisture buildup on roof framing.
- Uneven shingle aging or recurring ice dams.
Those clues do not prove one specific cause, but they give a contractor a useful starting point. Blocked soffit paths, insufficient intake, and air leakage from the living space may all need to be considered together.
11. Soffit and Fascia
Soffit is the underside of the roof overhang, while fascia is the visible board or trim along the roof edge. The soffit may contain intake vents, and the fascia often supports or visually finishes the edge while interacting with the gutters. Together, they connect the roof perimeter to the attic and exterior walls.
Rot, peeling finishes, insect damage, or clogged soffit openings can affect more than appearance. Water entering behind the fascia may damage framing, and blocked soffit vents can disrupt intended airflow. On older GTA homes we frequently find soffit vents that were painted over years ago and have provided little real airflow since. Repairs should preserve both the edge detail and the ventilation path.
12. Roof Penetrations and Pipe Flashing
Plumbing vents, exhaust outlets, skylights, and other penetrations interrupt the roof surface. Each opening needs a carefully fitted flashing assembly so water is directed around it rather than into the deck. Pipe flashing typically includes a base that sits beneath or over surrounding roof materials and a rubber collar that seals around the pipe, and that rubber collar is usually the first component on the entire roof to fail, often well before the shingles around it need replacing.
Rubber components can become brittle with age, while metal may corrode or separate from the surrounding layers. Look for cracked seals, lifted shingles, staining, and gaps around the penetration. Because water can travel along the decking, an interior ceiling mark may appear far from the actual opening.
13. Gutters and Downspouts
Gutters collect runoff at the eaves, and downspouts carry it toward a safe discharge point. They are part of the roof drainage system even though they sit at the edge of the building rather than on the roof slope. Correct pitch, secure hangers, and clear outlets help prevent overflowing water.
Debris should be removed regularly, especially beneath nearby trees. We generally recommend a spring cleaning and a late fall cleaning after leaf drop for most GTA properties. Downspouts should direct water well away from the foundation, and extensions may be needed where the discharge lands too close to the home. In a contractor discussion, Above It All Roofing’s guidance on protecting gutters during roofing work is a useful reminder that drainage components need attention during installation, not only afterward.
14. Roof Eaves and Rakes
Eaves are the lower horizontal edges of a sloped roof, while rakes are the sloping edges along the gable ends. These boundaries influence how water leaves the roof and how the roof covering meets trim, drip edge, soffit, and fascia. They are also among the most exposed edges during wind and rain.
A clean, continuous edge helps prevent water from reaching the decking or trim. At the rakes, wind can catch loose materials; at the eaves, poor alignment can send runoff behind the gutter. Inspectors often look for lifted shingles, damaged edging, exposed fasteners, and staining along both perimeter types.
15. Roof Ridge and Hip Boards
The ridge is the highest horizontal line on a sloped roof, while hips are the outside angles where roof planes meet. Ridge and hip boards may support or define these intersections, depending on the framing design. They also provide reference points for finishing materials and, at the ridge, possible ventilation.
These parts complete the geometry of the roof structure and connect several protective details. A ridge that is out of alignment can affect cap shingles, vent placement, and the appearance of the roof plane. When a roof is being repaired or replaced, the ridge and hips should be evaluated as part of the whole roof structure rather than treated as decorative edges.
How These Roofing Components Work Together
The roof’s performance depends on the connections between its parts. Water must move over the covering and away from openings, while air and heat must be managed below the deck. Thinking in terms of a system makes it easier to understand why a small defect can sometimes create a much larger repair.
Protecting Your Home From Water, Snow and Ice
Rain and melting snow should flow down the roof’s slope into valleys, gutters, and downspouts without reaching the interior. Shingles shed most of the water, but underlayment provides another protective layer, and flashing handles joints around walls, chimneys, skylights, and vents. Drip edge helps guide water away from roof edges and vulnerable fascia areas.
Roof geometry matters as much as the materials. Valleys concentrate runoff, while eaves and roof edges receive repeated exposure to water and ice. Poor installation at any of these transitions can allow moisture into the deck or wall assembly, even when the field shingles look undamaged.
Ventilation and Moisture Control
Ventilation allows air to enter near the eaves and leave through suitable exhaust points, such as a ridge or gable vent. Insulation helps limit heat transfer from the living space, while air sealing reduces warm, moist air moving into the attic. These elements must be planned together; adding an exhaust vent without adequate intake airflow may not solve the underlying problem.
A balanced attic can reduce condensation and help moderate seasonal temperature swings. Homeowners comparing vent layouts can review this guide to roof ventilation requirements, especially when an attic feels unusually hot or damp. For additional guidance on how insulation and attic ventilation work together to improve energy efficiency and moisture control, homeowners can also refer to Natural Resources Canada’s guidance on insulating roofs and attics. The goal is not simply to add more vents, but to create a deliberate path for air movement.
What Should Be Included in a Roof Replacement?
A roof replacement should involve more than removing old shingles and attaching new ones. The contractor should examine the existing assembly, identify damaged or unsuitable components, and explain what will be repaired or replaced. A written scope should make clear which layers, flashings, ventilation details, and cleanup tasks are included.
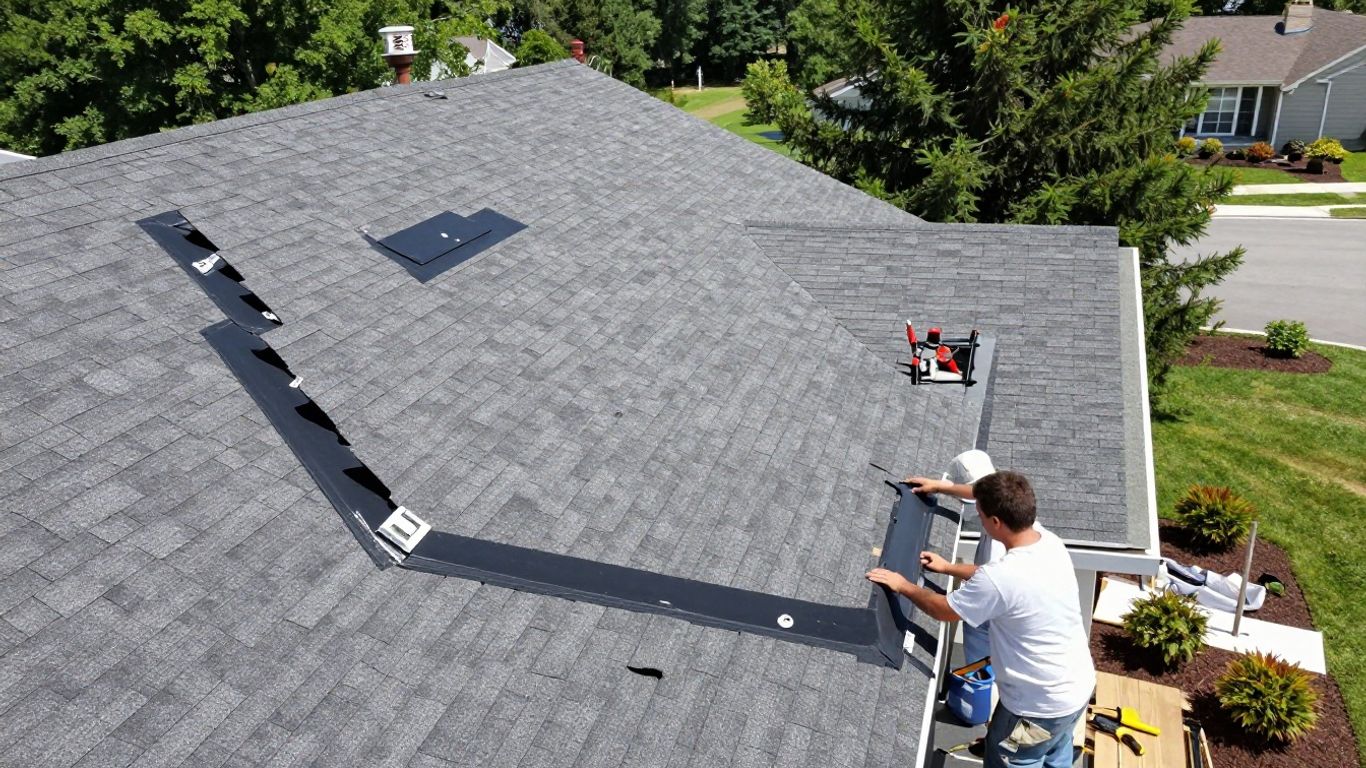
The right scope depends on the roof’s condition, design, and material. A replacement may reveal problems that were not visible during the initial estimate, so the agreement should explain how concealed damage will be handled. In our experience, a meaningful share of GTA replacements uncover some decking damage that wasn’t visible before tear off, especially on homes with a history of ice damming. Comparing roofing material choices can also help homeowners select a covering that suits the home’s architecture, weather exposure, and budget.
Inspecting the Roof Deck and Existing Components
Once the old covering is removed, the roof deck should be checked for rot, sagging, delamination, and areas weakened by long term moisture. The rafters or trusses, eaves, valleys, existing flashing, vents, and gutters also deserve review. Damaged wood or poorly secured components should not simply be covered by a new surface.
A careful inspection gives the homeowner a clearer picture of the roof structure and prevents a cosmetic replacement from hiding a structural issue. It also creates an opportunity to correct old installation problems before the new roof layers are installed.
Installing Proper Waterproofing and Underlayment
Underlayment is installed over the deck beneath the roof covering and acts as a secondary water shedding layer. Specialized protection may be used at eaves, valleys, and other areas exposed to ice or concentrated runoff. The material should be installed with the correct overlaps, fasteners, and transitions for the roof design.
This layer is easy to overlook because it disappears once the shingles or panels are installed. Nevertheless, it can provide valuable protection if water gets beneath the outer covering or if a section is temporarily exposed during installation.
Flashing, Ventilation and Drainage
Flashing should be inspected or replaced wherever the roof meets a wall, chimney, skylight, plumbing penetration, or change in plane. The replacement scope should also address drip edge, valleys, vents, soffits, gutters, and downspouts. These details determine how water leaves the roof and how the attic manages heat and moisture.
The following questions help organize a replacement conversation:
- Are all wall, chimney, valley, and vent flashings being replaced or reused?
- Is the existing ventilation balanced between intake and exhaust?
- Will damaged decking be priced separately if it is discovered?
- How will gutters, landscaping, siding, and exterior property be protected?
Answers should appear in the estimate or contract rather than being left to assumption. A detailed scope makes it easier to compare proposals and understand what the finished roof will actually include.
Shingles and Final Roof Installation
The roof covering is installed only after the deck, underlayment, and detail work are ready. Shingles or panels should follow the manufacturer’s installation pattern, with attention to starter courses, valleys, hips, ridges, penetrations, and exposed fasteners. The finished work should have clean lines, secure edges, and properly sealed transitions.
Final installation also includes removing debris, checking grounds and gutters, and reviewing the completed work with the homeowner. A reliable closeout should identify warranty documents, maintenance needs, and any areas that require future observation.
Common Signs That a Roofing Component Needs Attention
Roof problems do not always begin with a dramatic collapse. Small changes, such as a stain after heavy rain or a handful of granules in a gutter, can point to trouble in one of the roof layers. Regular visual checks from the ground and occasional professional inspections help catch problems while repairs are still manageable.
Water Leaks and Ceiling Stains
Brown ceiling marks, damp insulation, peeling paint, or a musty attic smell may indicate water entering through the roof assembly. The visible stain is not always directly below the entry point because water can travel along decking, rafters, and insulation. Leaks should be investigated promptly, even if the ceiling dries after a storm.
A temporary patch may limit immediate exposure, but it does not identify whether the cause is a shingle, flashing joint, vent boot, valley, or damaged deck. Finding the entry path is essential to making a lasting repair.
Damaged or Missing Shingles
Cracked, curled, lifted, blistered, or missing shingles can expose underlayment and decking to weather. Granule loss, bare patches, and shingles scattered in the yard may follow wind or hail. Damage concentrated in one area may be repairable, while widespread deterioration can indicate that the covering is nearing the end of its useful service.
Do not walk on a steep or wet roof to inspect these conditions. Binoculars and a ground-level view are safer, and a qualified professional can assess damage without creating additional problems.
Damaged Flashing or Roof Edges
Loose metal, separated sealant, lifted edge material, and rust around penetrations deserve attention. Flashing is especially important where two surfaces meet because those joints receive complex water flow. Missing or poorly installed drip edge can also allow water to reach fascia and decking.
Homeowners can learn more about common roofing mistakes, including neglected flashing, inadequate ventilation, and installation errors. The practical lesson is simple: a visible edge detail may protect a much larger area of the home.
Poor Attic Ventilation or Moisture
An attic that feels excessively hot, smells damp, or shows condensation on nails may have a ventilation, insulation, or air sealing problem. Frost in winter and mold like growth can also signal that warm indoor air is reaching cold surfaces. These symptoms should be assessed alongside soffit vents, exhaust vents, insulation placement, and attic penetrations.
Ventilation problems can affect both comfort and roof durability. They are rarely solved by one isolated change, so the whole airflow path should be reviewed before new vents or insulation are added.
Need Professional Roofing Help?
If your roof leaks repeatedly, shows widespread surface damage, has started to sag, or has details you can’t safely reach, it’s worth having a trained roofer take a look. Our team at Above It All Roofing inspects both the visible covering and the less obvious components (decking, flashing, ventilation) without asking you to get on a ladder to find out what’s wrong. We can also tell you honestly whether you’re looking at a localized repair or a replacement that needs broader work.
When requesting an estimate, ask for the proposed materials, preparation work, ventilation details, flashing plan, cleanup responsibilities, and warranty information. A written scope is useful because it shows whether the quote addresses the roof structure and roof layers or only the outer covering. Homeowners may also review this contractor selection guide before choosing who will perform the work.
Routine maintenance remains valuable after a new roof is installed. Keep gutters clear, watch for storm damage, avoid pressure-washing shingles, and arrange inspections when the roof has experienced severe weather or persistent moisture. Small repairs made early can protect the surrounding deck, insulation, ceilings, and walls from more extensive damage.
Need help assessing your roofing system? Contact Above It All Roofing to schedule a professional roof assessment. Their team can help identify problem areas and recommend the right roofing solution for your home.
Conclusion
Understanding roofing system components helps homeowners look beyond shingles and see how the roof structure, waterproofing, flashing, drainage, and ventilation work as one protective assembly. That knowledge makes inspections, repair decisions, and replacement estimates easier to understand—and can help minor defects receive attention before they become major water or structural problems.
Frequently Asked Questions
What are the main components of a roofing system?
The main components include the roof structure, deck or sheathing, underlayment, roof covering, flashing, drainage features, insulation, and ventilation. Edge details, penetrations, and gutters also play important roles. A full system replacement on a typical GTA home involves all of these working together, not just new shingles laid over the old deck.
What Goes Under Roof Shingles?
Several layers typically go under roof shingles, including the roof decking, ice and water shield (required by Ontario Building Code to extend a minimum distance past the interior wall line), and synthetic roof underlayment. These layers help protect the roof structure from moisture and provide a stable surface for the shingles. Depending on the roof design, flashing and ventilation components are also installed to improve water management and airflow.
Why Is Roof Flashing Important?
Roof flashing helps prevent water from entering vulnerable areas where the roof meets walls, chimneys, skylights, valleys, or other structures. Properly installed flashing, step flashing at walls and counterflashing at masonry chimneys, directs water away from these areas and helps reduce the risk of leaks, wood rot, and interior water damage. In our experience, flashing errors are among the most common causes of the leaks we’re called out to diagnose.
What Does an Ice and Water Shield Do?
An ice and water shield is a waterproof membrane installed in areas that are particularly vulnerable to moisture, such as roof edges, valleys, and around certain roof penetrations. It provides an additional layer of protection against water infiltration caused by ice dams, wind driven rain, and melting snow, a real concern anywhere that sees repeated freeze thaw cycles each winter, including throughout the GTA.
Why Does a Roof Need Ventilation?
Proper roof ventilation allows air to circulate through the attic, helping control heat and moisture buildup. Building code sets minimum net free ventilation area based on attic floor space. Good ventilation can reduce condensation, protect insulation and roof decking, and help prevent moisture related problems such as mold and wood deterioration. A balanced intake and exhaust ventilation system is important for effective airflow; adding exhaust vents without matching intake can pull conditioned air from the house and worsen ice damming.
How Do I Know If My Roof Needs Repair or Replacement?
Signs such as missing or damaged shingles, recurring leaks, deteriorated flashing, sagging, or widespread wear may indicate that your roof needs professional attention. Minor, localized damage may be suitable for repair, while extensive damage, aging materials nearing the end of their rated lifespan, or widespread deterioration may make roof replacement the more practical option. A professional roof inspection can help determine the condition of the entire roofing system and the appropriate solution.
Can a single damaged shingle cause a roof leak?
Yes, a missing or damaged shingle can allow water to reach lower layers, although leaks may also come from flashing, valleys, vents, or the deck, sometimes appearing well away from the actual source as water travels along the decking. The source should be confirmed before a repair is chosen.