
Every Ontario winter brings the same call to our office: water staining a ceiling on the top floor, usually in January or February, almost always after a cold snap followed by a thaw. The culprit is rarely a “bad roof.” It’s an ice dam, and in more than 25 years of roofing across Halton Hills, Georgetown, Acton, Milton, and the wider GTA, it’s one of the most common and most misunderstood winter problems we see. This guide explains what ice dams actually are, how to recognize them before they cause damage inside your home, and how to prevent and safely remove them.
The short version: those long icicles along your eaves are not just decoration. They’re often the visible sign that meltwater is backing up under your shingles. Here’s how that happens and what to do about it.
What an Ice Dam Is and Why It Damages Your Home
An ice dam is a ridge of ice that forms along the cold edge of your roof — usually at the eaves and over the unheated overhang. It forms through a cycle that Ontario’s freeze-thaw winters are perfectly built to create: heat escaping from the living space warms the underside of the roof deck, snow on the upper roof melts, the meltwater runs down to the cold eave, and there it refreezes. Repeat that over a few days, and the ice builds into a dam. Once the dam is established, the next round of meltwater has nowhere to drain. It pools behind the ice and works its way up and under the shingles.
That trapped water is the real problem. Asphalt shingles are designed to shed water flowing downhill, not to hold back standing water pushing uphill, so once it gets under the shingle course, it finds the deck, the underlayment seams, and eventually the inside of your home. From there, it soaks insulation (which loses much of its R-value when wet, raising your heating bills), stains drywall, blisters paint, and, if it lingers, feeds mould growth from trapped roof moisture. We’ve opened up more than a few eaves in spring to find the roof deck sheathing soft and delaminated after a winter of repeated ice damming, with the damage hidden the whole time behind an intact-looking ceiling.
How to Spot an Ice Dam Early
Catching an ice dam early is the difference between a minor fix and a damaged ceiling. Most warning signs are visible from the ground, and a few show up inside the house before you ever see ice. The signs below are worth a quick look after any significant snowfall or mid-winter thaw.
From the ground, look for these clues on the roof itself:
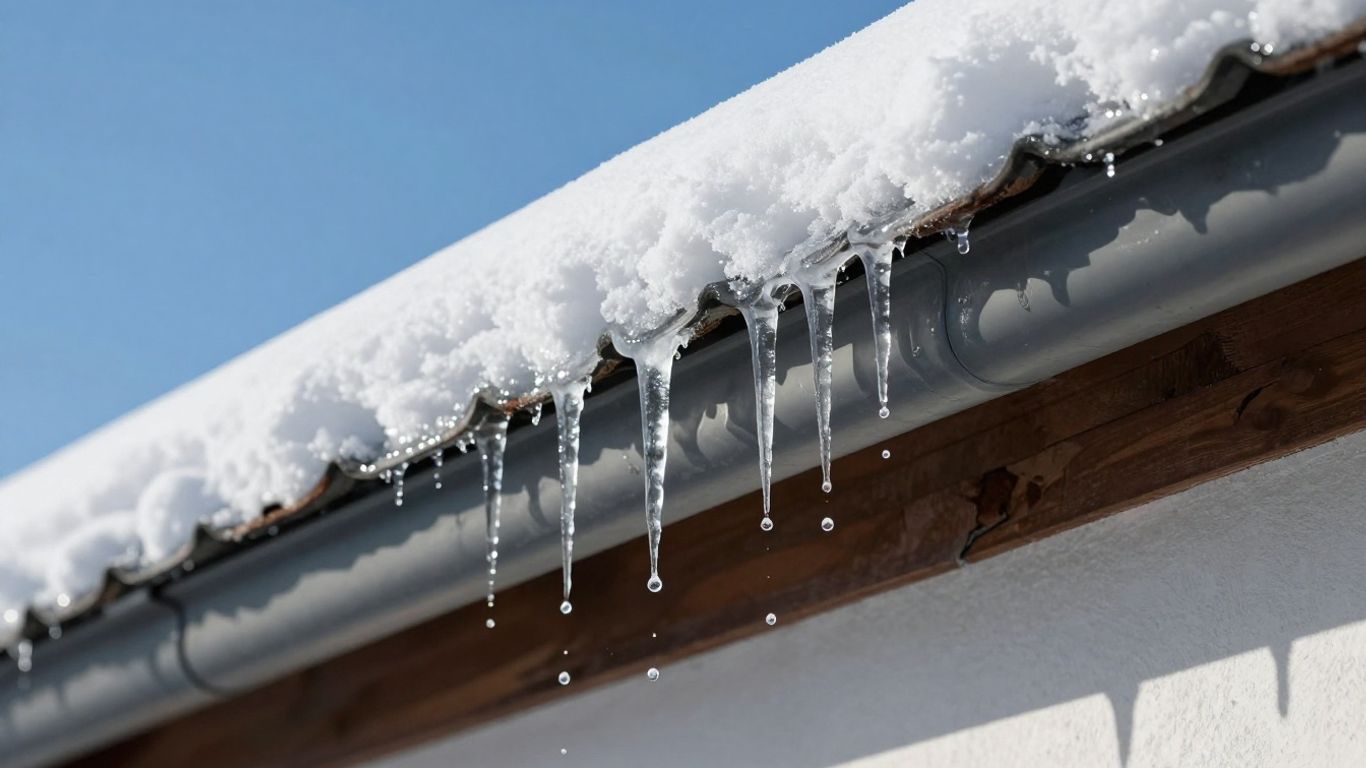
- A thick row of icicles along the eaves or gutters — a few small ones are normal, but a heavy, continuous band signals water that isn’t draining.
- A visible ridge of ice is building right at the roof edge, like a low wall.
- Uneven melting, where snow disappears quickly near the peak but stays packed at the eaves. That pattern usually means heat is escaping into the attic and warming the upper deck.
- Gutters are packed solid with ice, which can’t carry meltwater away and makes the problem worse.
Inside the home, the early signs often appear on the top floor before any ice is obvious outside:
- Brown or yellow water stains are spreading on upper-floor ceilings or exterior walls.
- Paint that bubbles, peels, or blisters as moisture collects behind it.
- A musty, damp odour near the roofline.
- Unusually drafty rooms directly under the roof, which can indicate the same air leaks that feed the dam.
If you’re seeing interior stains, treat it as active water intrusion and address it promptly. This is the point where a small problem becomes an expensive one, and where roof leak repair may already be needed.
Preventing Ice Dams: Keep the Roof Deck Cold

Every effective prevention strategy comes down to one principle: keep the roof deck the same temperature as the outside air, so snow melts naturally instead of melting and refreezing. In Ontario’s climate, that means addressing three things together: air sealing, insulation, and balanced ventilation. Treating only one rarely solves the problem.
Seal air leaks first. Warm, moist household air escapes into the attic through gaps you can’t see: around pot lights, plumbing stacks, electrical penetrations, the attic hatch, and bath fans that dump into the attic instead of outside. That warm air is what melts the snow from below. Sealing these leaks tackles the root cause, and doing it before adding insulation is far more effective than insulation alone.
Insulate to the right level. Adequate attic insulation slows the heat moving from your living space into the attic. In our region, we typically want to see attic insulation well above older minimums; a properly sealed and insulated attic keeps household heat downstairs where it belongs.
Balance the ventilation. Even a well-insulated attic needs airflow to stay cold and dry. The standard target is roughly one square foot of net free vent area for every 300 square feet of attic floor, split between intake at the soffits and exhaust at the ridge. That balanced intake-and-exhaust flow keeps the deck temperature even and carries away moisture. Unsure whether your roof has enough? Our guide on how many roof vents you need is a good starting point, and correcting an undersized system is exactly what our attic ventilation work addresses. We’ve had clients whose recurring winter ice problems stopped entirely once we added proper intake venting at the soffits to match the exhaust at the ridge.
There’s also a defence built into the roof itself. On any roof we replace, we install self-adhered ice-and-water shield membrane at the eaves and in the valleys. The Ontario Building Code, following the National Building Code Section 9.26, requires this eave protection to extend from the edge to a point at least 900 mm (about 36 inches) inside the home’s exterior wall line. That membrane is your last line of defence: if a dam does form, it stops the backed-up water from reaching the deck. It’s also a reason overlaying new shingles on top of an old layer is a poor idea in our climate — it hides whether that protection is even present.
What to Do If You Already Have an Ice Dam
If a dam has already formed, the most important thing is what not to do. Chipping at the ice with a hammer or axe will damage your shingles and gutters and can void your roofing warranty. Rock salt and harsh de-icers corrode metal and stain siding. Pressure washers force water up under the shingles, the exact thing you’re trying to prevent. These DIY shortcuts cause more callbacks than the dams themselves.
Safer steps you can take from the ground include:
- Rake the lower roof. A telescoping roof rake used from the ground to clear snow from the lowest few feet of the roof removes the fuel for the melt-refreeze cycle. Never get on a ladder or the roof in icy conditions to do this.
- Create a drainage channel cautiously. In a pinch, running lukewarm (never boiling) water to open a channel through the dam can relieve pooling, though it’s a short-term measure.
- Treat heat cables as a stopgap. Electric cables along the eave can melt channels in problem spots, but they manage the symptom and don’t fix the underlying heat-loss and ventilation issues.
When water is actively entering the home, when the dam is large or out of safe reach, or when the problem returns every winter, it’s time to bring in professionals. We remove ice dams with low-pressure steam, which melts the ice without harming the shingles underneath, the only method we consider safe for the roof. If water is already coming through, our emergency roof repair team can stop the active intrusion, and our professional ice dam removal service clears the ice and identifies why the dam formed so it doesn’t simply return next year.
A Note on Insurance
Homeowners often ask whether insurance will cover ice dam damage, and the honest answer is that it depends on your policy. Many Ontario insurers will cover sudden interior water damage from an ice dam, but treat the dam itself — and any roof or attic deficiencies behind it — as a maintenance responsibility. Coverage, deductibles, and the effect of a claim on your premiums vary, so check your specific policy and speak with your broker before assuming you’re covered. A photographic inspection report, which we provide, can help support a claim if you need to file one.
The Bottom Line
Ice dams are a predictable result of Ontario winters meeting a roof that’s losing heat, draining poorly, or both. The lasting fix isn’t fighting the ice each January, it’s keeping the attic cold and dry through air sealing, proper insulation, and balanced ventilation, backed by code-compliant ice-and-water shield at the eaves. If you’re seeing heavy icicles, uneven roof snowmelt, or any sign of water inside, don’t wait for the ceiling stain to spread. You can schedule a roof and attic assessment, and we’ll find the cause, not just clear the symptom.
FAQ
What exactly is an ice dam, and why is it such a big deal?
An ice dam is a ridge of ice along the cold edge of your roof. It forms when heat escaping into the attic melts snow on the upper roof, the meltwater runs to the cold eave and refreezes, and the ice builds into a barrier. Once it forms, new meltwater pools behind it and is forced up under the shingles, where it can reach the deck and the inside of your home — causing stains, soaked insulation, and mould. It’s a big deal because the damage is often hidden until it’s significant.
What are the warning signs?
From outside: a thick continuous band of icicles at the eaves, a visible ridge of ice at the roof edge, gutters packed with ice, and snow that melts fast at the peak but stays packed at the eaves. From inside: brown water stains on top-floor ceilings or walls, bubbling or peeling paint, a musty smell near the roofline, and drafty upper rooms.
How do I stop ice dams from forming in the first place?
Keep the roof deck cold. That means three things working together: sealing the air leaks that let warm household air into the attic, insulating the attic to the right level, and providing balanced ventilation (soffit intake plus ridge exhaust, around a 1:300 vent-to-floor-area ratio). Code-required ice-and-water shield at the eaves provides backup protection if a dam does form.
What’s the safest way to remove the ice dam I already have?
Don’t chip it with tools, don’t use salt or de-icers, and don’t use a pressure washer — all of these damage the roof. From the ground, a roof rake to clear the lower roof’s snow helps. For an established dam, the safe professional method is low-pressure steam, which melts the ice without harming the shingles. If water is entering your home or the dam is out of safe reach, call a professional.
Will my home insurance pay for ice dam damage?
It depends on your policy. Some Ontario insurers cover sudden interior water damage from an ice dam, but many treat the dam and underlying roof or attic deficiencies as a maintenance issue that isn’t covered. Deductibles apply, and a claim can affect future premiums. Check your policy and ask your broker; keep documentation and a photographic report if you need to file.
Are electric heat cables a real solution?
They help in specific problem spots by keeping a melt channel open, but they’re a stopgap, not a cure. They manage the symptom while consuming electricity all winter and don’t address the heat loss and ventilation issues that cause damage. For lasting prevention, air sealing, insulation, and balanced attic ventilation are far more effective.